- Home•
- Categories•
- Product Information•
- Attachments•
- Bridgework•
- Double Mandrel BPD (dovetail)
Product Information
Attachments
BPD Attachment
Summary
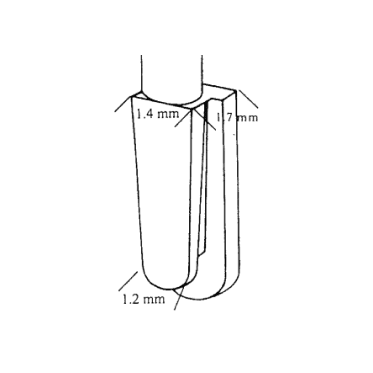
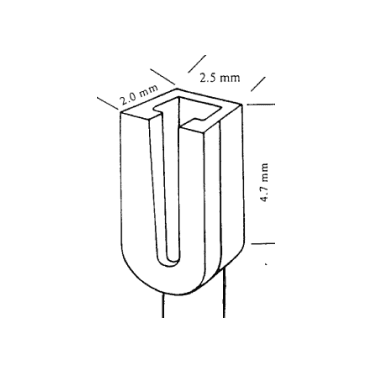
The BPD is an improved design for a universal plastic pattern.
The simple to use plastic dovetail intracoronal attachment can be used for:
- Removable Partial Dentures: Intracoronal semi-precision slide attachment. Rigid attachment (always use a retentive clasp arm) with friction (not adjustable) retention.
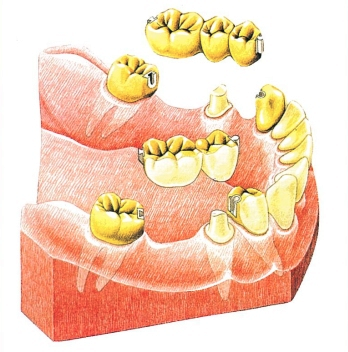
- Bridgework: non-parallel abutments and segmented constructions.
- Inside of female rounded to facilitate devesting and avoid attachment wear
- Built in paralleling mandrels for both male and female.

The built in mandrel on the male and female provides the convenience of using the BPD in a traditional manner, or inverting it.
By inverting the BPD,
- No metal is shown on the occlusal surface for better esthetics.
- Placing the male extracoronal of the crown does not require additional space, or abutment reduction.
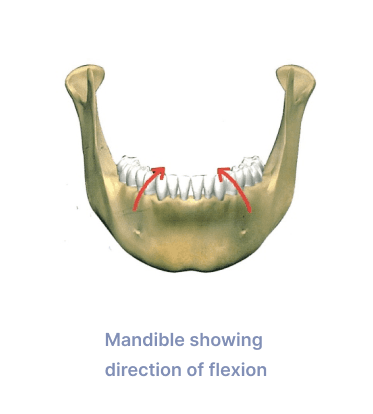
- On mandibular implant cases, the female tends to follow the taper of the male and allow for some flexing of the lower jaw.


Bridgework

The patterns are produced in a clean burnout plastic. The reduced size provides wider application, better abutment contours, and improved esthetics. Taper ensures easy insertion and well defined proximal plates provide increased stability. A universal attachment.
Assembly and Fabrication
Bridgework–Traditional (female on abutment, male in pontic)
- Survey the model to determine the position of the Plastic Dovetail. Wax all abutments, but open a channel or box on the abutment to allow space for the female attachment within the contours of the crown.
- Place the male mandrel in the surveyor. Cut the mandrel from the bottom of the female. Place the female on the male. Incorporate the female in to the abutment wax-up. Keep the entire female within the correct contour for the abutment tooth.
- Carefully remove the male from the female, and complete waxing of abutments to proper contour. Keep the inside of the female free from wax.
- Any excess of the female pattern above the occlusal of the abutment is left remaining. This will be reduced after casting. Use a harder alloy for the abutment crown to avoid the female attachment wearing.
- Sprue and remove the abutment patterns. Invest, being sure to completely fill the inside of the female with investment without air bubbles. A two stage investment procedue is recommended.
- Burnout for plastic components requires two stages:
- To assure a clean and complete burnout of the plastic attachments, use a Slow rate of temperature rise to 600°F (316°C) and hold for 30 minutes.
- Complete the burnout procedure by following the alloy manufacturer’s instructions.
- Finish the casting. Reduce any excessive height of the attachment at this time. Remove any bubbles from the inside of the female.
- For traditional applications, insert the plastic male into the cast female. If the male pattern will not fully seat, heat the cast abutment prior to seating the male pattern. The heat will soften the male pattern so it will contour to the female.
- Seat the male pattern in the female and wax the adjacent pontics or abutments to the male.
- Cut off the mandrel from the male with a hot spatula. Sprue, invest and cast the units.
- Finish the castings and the male. If the fit is too tight and the male will not fully seat, use one of the following procedures to achieve proper seating.
- Strip the male for 15 – 20 seconds, or until a positive seating is aquired.
- Paint Liquid Colloidal Graphite on the male, dry it with a gentle stream of air, and slide it in and out of the female until a complete seating is achieved.
- Gently polish the male until complete seating is achieved.
Bridgework–Inverted (male on abutment, female in pontic)
- Survey the model to determine the position of the Plastic Dovetail. Wax all abutments.
- Place the female mandrel in the surveyor. Cut the mandrel from the bottom of the male. Place the male into the female. Incorporate the male in to the abutment wax-up.
- Carefully remove the female from the male, and complete waxing of abutments to proper contour. Cut the mandrel off the female, and position inside the pontic. Keep the inside of the female free from wax.
- Any excess of the male pattern above the occlusal of the abutment is left remaining. This will be reduced after casting. Use a harder alloy for the abutment crown to avoid the male attachment wearing.
Removable Partial Denture Procedure (intracoronal attachment)
Steps 1 – 11 are the same as in the Traditional Bridgework technique.
- Prepare the lingual of the retainer crown for the clasp arm. Eliminate any lingual undercuts and prepare a dimple on the lingual of the crown away from the female with a #3 round bur.
- Place the male pattern in the female receptacle on crown. Remove the mandrel from the male.
- Using pattern resin, make clasp arms to the male pattern. Be sure to extend the clasp arm into the dimple. Use an alloy which is softer than that used to cast the attachment female.
- Block out all undercuts and duplicate the model. Pour a refractory model used to fabricate only the partial frame.
- Cast the framework in chrome cobalt. Finish the casting.
- Seat the completed casting on the master model. If the fit is too tight and the male will not fully seat, one of the following steps may be used to achieve proper seating.
- Strip the casting for 15 – 20 seconds, or until a positive seating is aquired
- Paint Liquid Colloidal Graphite on the male dry it with a gentle stream of air, and slide it in and out of the female until a complete seating is achieved.
- Gently polish the male until a complete seating is achieved.
- If the fit of the male is too loose, lightly reduce the base of the male with a dis to insure a proper fit.
- Solder the male/lingual arm assembly to the partial framework using Ceka Sol solder.
- Process the partial denture over the completed castings in a routine manner
Removable Partial Denture Procedure (extracoronal attachment)
- The paralleling mandrel on the female is used to wax the male, extracoronally, on the abutment wax pattern. If the attachment is too long, shorten both the male and female from the gingival aspect. The male is inverted, or “upside down”.
- Carefully remove the female from the male pattern.
- Complete waxing the abutments for proper contour. Prevent the wax from flowing onto any mating surface of the male pattern.
- Remove the paralleling mandrel from the bottom of the female. Replace the female onto the male pattern and wax the female to the adjoining abutment/pontic.
- Sprue and remove the abutment patterns. Invest, being sure to completely fill the inside of the female with investment without air bubbles
- Burnout and cast. Burnout for plastic components requires two stages:
- Slow rate of temperature rise to 600°F (316°C) and hold for 30 minutes. This assures a clean and complete burnout of the plastic piece.
- Complete the burnout procedure by following you alloy manufacturer’s instructions.
- Remove any bubbles and finish the castings according to Step 14 in the “Removable Partial Denture Procedure (intracoronal attachment)” section.