- Home•
- Categories•
- Product Information•
- Attachments•
- Extracoronal Attachment•
- American Mini (Mini-Dalbo / Swiss-Mini)
Attachments
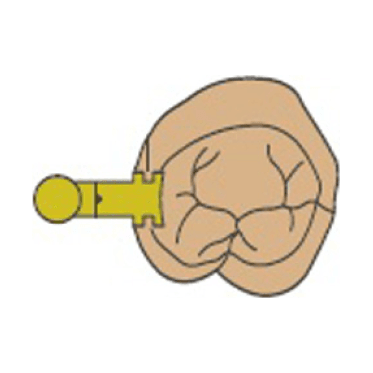
Extracoronal attachment allowing hinge movements with excellent stability: 3.0mm vertical, male 2.5mm Ø, female 3.5mm Ø
Components for the American Mini
Compatible with Mini-Dalbo and Swiss Mini
Technical Considerations
Survey the model to determine the most favorable path of insertion. Wax the abutment crown(s) to full contour.
Create a recess in the wax pattern to receive the male element. Using the paralleling mandrel, place the male(s) into the crown wax-up as low as possible without impinging the tissue. Be sure to enclose the vertical groove for retention in the casting.


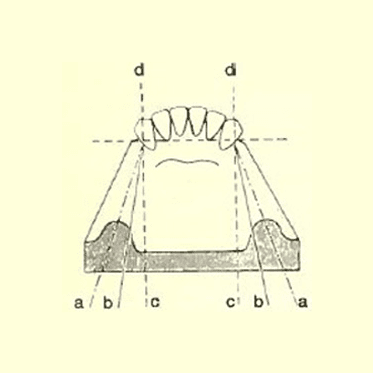
The American Mini males must be parallel with the vertical plane. To hinge smoothly, the males should not be significantly divergent in the sagital plane. The males must be parallel (line “C”) or bisect the angle between the crest of the ridge and the sagital plane (line “B”).
Sprue the wax pattern and males, invest, cast, and finish the crowns or bridge(s). The plastic castable male should be cast in non-precious. Do not sandblast the attachments as this may damage them.
After casting, do not polish the American Mini cast-to males, just air blast with glass beads before delivery. The gingival aspect of male is the only portion of the attachment which can be polished to facilitate hygiene.
Clinical
Try in the crowns and/or bridge(s). If necessary, take a pick-up impression with the crowns in place for new processing model. Return the impression or model with instructions for any changes to the technician.
Technical
If a “pick-up” impression was made for a new master model, insert transfer dies into crowns and pour the new master model with crowns in place. Rearticulate the new master models and check for any necessary adjustments.
Temporary rest struts should be added to mandibular frameworks which will hold the partial frame in place while the female elements are luted to the partial framework. The partial frame should be designed to support the female loop(s).
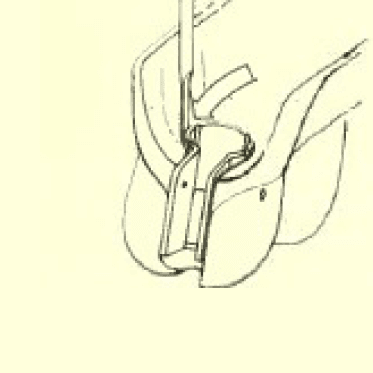
Cast and finish the partial framework. Block out the adjustable flanges on the female with wax and lute the female(s) to the partial framework with auto-cure or light cure resin.
The upright portion of the American Mini male element should be shortened to allow space for the denture tooth. The American Mini male may be shortened to the height of the female (3mm).
Clinical
Try-in the crowns/ bridge(s), and partial. Check for proper attachment function. Check the occlusion and the esthetics. Return the models, crown, bridge(s), and partial(s) to the technician with written instructions for any additional changes.
Technical
Remove crowns and preps on model. Remove frame with set-up from the model. Fill in female element(s) with thin plaster and quickly reposition frame with set-up on model. Smooth missing crown area with plaster. Invest the partial and boil out the wax.
Acrylic Processing
Carefully block out adjustable flange areas of the female with a latex material such as RubberSep. The blockout will create a space which will allow the flanges to flex properly over the male ball and be adjustable. Process the acrylic. Deflask and finish the partial. Remove any temporary rest struts. Verify that partial fits with the crowns and exhibits proper hinge function. Return the completed restoration to the dentist. Include information including the shade, mold number, attachment name and order number.
Clinical
Review and check the final restoration.Remove the temporary crowns and bridge(s). Try-in the restoration and adjust the retention. (We recommend using the least retention possible). Check for sore spots and adjust the occlusion. Seat the crowns / bridges with temporary cement one side at a time, opposite side should be seated without cement until first side is set. The removable partial denture must be seated before the cement sets. Seat remaining crowns / bridge with temporary cement.
Instruct the patient on the insertion and removal of the partial and care of the tissue below and around the attachment. After approximately two weeks, recall the patient for permanent cementation. At this time you may determine if a reline is required. Record the attachment name and order number in the patient’s file. Recall the patient (in 3 to 6 months) to determine if the removable partial requires a reline and to assure continued proper function of the restoration.
Adjusting Retention
The retention may be adjusted simply by bending slightly the buccal / lingual flange

Making New Partial Denture to Existing Crown
Clinical
Place American Mini females on the American Mini males intraorally and ensure that the attachments are in the correct position perpendicular to the male. Block out the underside of the distal extension of the females with temporary cement to prevent rotation of the matrix on the ball. Take a pick-up impression, withdrawing American Mini female elements.
Technical
The Mini analogs are inserted vertically into the females. Secure the analogs with sticky wax to prevent them from working loose when pouring the stone model. Pour model stone into impression, taking care that the Male Analogs do not move. When set, remove impression and take out the attachment females and reseat onto the analogs. You will see that the attachment will only seat in one position and will not rotate. Process acrylic, blocking out the females phalanges as described in Acrylic Processing.