- Home•
- Categories•
- Product Information•
- Attachments•
- Extracoronal Attachment•
- Universal IC Attachment
Attachments
A popular spring loaded plunger attachment that provides resilient movement for abutment protection without requiring an abutment crown. The IC attachment requires a 180 degree reciprocal lingual arm if free end. Universal
Male: 5.2mm length, 2mm Ø, 1mm nose
Universal Female: 2mm Ø, 0.8mm deep
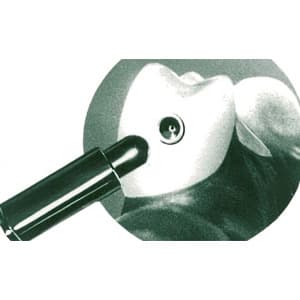
Indications
- Esthetic partial dentures (no buccal clasp required)
- Overdentures
- Telescopic retentive elements
- Removable periodontal splints
Features
- No crown preparation required
- Simple fabrication and servicing
- Allows hinge freedom and slight vertical resilience
- Provides excellent retention with superior esthetics and hygiene
- In rest position the attachment is totally passive
Products
Partial Denture Fabrication
Prior to taking the impression for the master model, adapt a small amount of impression material into the female (alginate is not recommended). Wipe off any excess material before seating the impression tray. This will ensure an accurate reproduction of the female in the model. The same technique should be followed when making the refractory model.
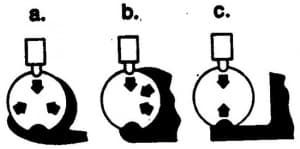
The IC Attachment eliminates facial clasps. Retention is provided by the attachment. However, in free-end saddle situations, the abutment tooth must have a 180º reciprocal action (non-retentive) lingual clasp.
Caution: One of the three illustrated basic designs is necessary to maintain the proper position of the plunger.
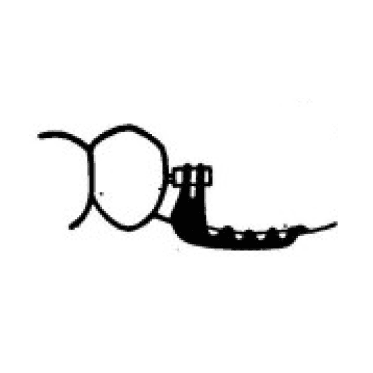
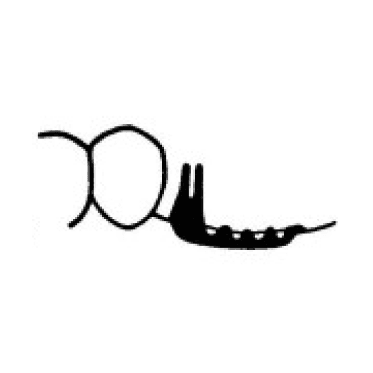
Do not solder the male to the partial denture framework. The male should be retained and supported in the partial denture by resin only. However, the framework can be waxed to include struts or loops around the male. The area behind and immediately gingival to the male should be kept free from the framework. This will allow access for adjustments or repairs at a future time.
If the framework design shown is desired, the following procedure is recommended:
- Prepare the master model for duplication
- On the master model, position the male perpendicular to the female with the plunger of the male passively engaging the female (no compression of the plunger). With the male in this position, lute the plunger to the female with sticky wax. The sticky wax should also serve to block out the plunger area. Block out the area beneath the male cylinder (FIG 12), then take the impression for the refractory model.
- Pour the refractory model. The resulting representation of the male will allow the framework to be waxed as desired.
- Cast and finish the frame in a routine manner.
- Position the finished frame back on the master model.
- With the male in passive position and the plunger blocked out, secure the male to the frame with self-curing acrylic. There should be no voids in the acrylic behind the male. Such voids could allow the male to slide away from the female.
- Complete set-up and try in.
- Prior to processing, block out the plunger of the male with Rubber Sep.
- Complete processing in a routine manner.
Option using plastic housing–lute the plunger to the plastic housing. Remove the plunger and cast the framework with plastic housing.
Cold cure the plunger into the prosthesis using the cast housing.
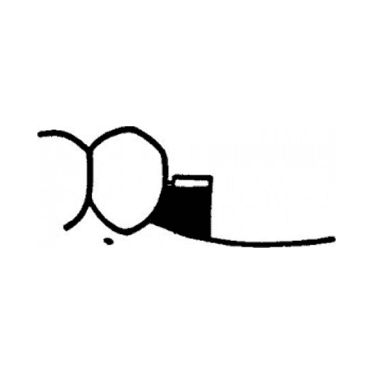
If the struts and loops are not to be fabricated, the following procedure is recommended:
- On the refractory model, the framework is waxed such that the area gingival to and behind the intended position of the male is free from framework construction.
- The frame is cast and finished in a routine manner.
- With the finished frame on the master model, position the male perpendicular to the female with the plunger of the male passively engaging the female (no compression of the plunger). With the male in this position, lute the plunger to the female with sticky wax.
- The sticky wax should also serve to block out the plunger area.
- Secure the male to the frame with self-curing acrylic. There should be no voids in the acrylic behind the male. Such voids could allow the male to slide away from the female.
- Complete set-up and try in.
- Block out the plunger of the male using Rubber Sep.
- Complete processing in a routine manner.
Rebasing
- Vaseline or a similar lubricant can be used over the male plunger to aid in insertion and removal.
- When taking a routine wash impression, guide the patient to a passive closure. When seated, the rest(s) should indicate the original passive position of the partial.
- Remove any excess of impression material from around the male plunger.
- Block out the plunger using Rubber Sep prior to rebasing.
- Rebase in a routine manner.
Servicing
- Retention adjustments or replacement of the male can be done in the laboratory or chairside.
- Adjustments for retention are made by positioning the male forwards (to increase retention) or backwards (to decrease retention). This is done by removing the acrylic behind the male and repositioning the male as desired. Application of heat to the acrylic in the area of the male will facilitate repositioning.
- Fill the void behind the male with self-curing acrylic.
- The same procedure is used when the male is to be replaced with a new male attachment.