- Home•
- Categories•
- Product Information•
- Attachments•
- Implant Abutments•
- LOCATOR® Self-Aligning
Attachments
The LOCATOR® Implant Abutment System is arguably the World’s most popular implant attachment system. Specifically designed for full-arch or partial overdentures, the LOCATOR® Abutment system pivots and self-aligns to assure proper insertion, removal, and retention during function.
- Self-Aligning Attachments
- Simple patient insertion/removal of prosthesis
- Unique patented pivoting technology
- Compensates for path of insertion up to 40° of divergence between implants
During seating, the LOCATOR® nylon male pivots inside the denture cap, centering the nylon male on the female abutment before engagement. These two actions in concert allow the LOCATOR® to self-align, enabling patients to easily seat their overdenture without the need for accurate alignment and without causing damage to the attachment components.
The LOCATOR® system offers standard and extended range retention inserts which are designed for maximum versatility, retention and angulation to suit each patient’s needs.
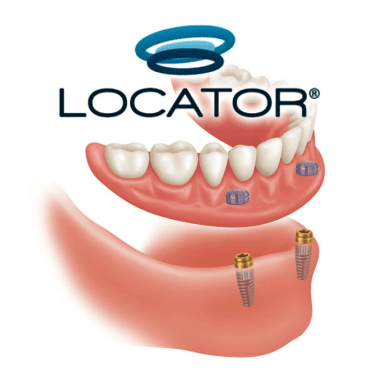
LOCATOR® – Self-Aligning Design
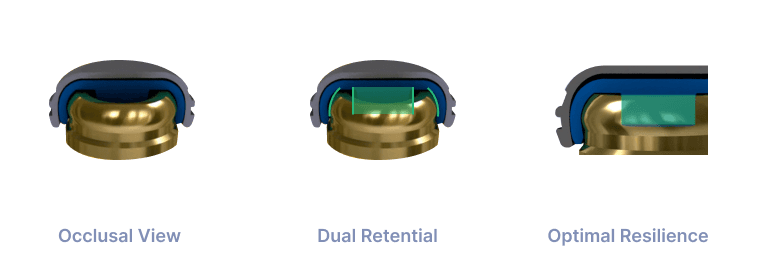
The LOCATORs pivoting action and self-aligning design allow the attachments to seat effortlessly
The rounded surface of the LOCATOR® attachment allows the male to center on the attachment before engagement so it can easily locate its proper position while the LOCATOR® male pivots inside the denture cap
Once seated, the LOCATORs dual retention feature provides a firm connection both inside and outside of the attachment, delivering twice the amount of retention surface area compared to other attachments
Also once seated the LOCATOR® male remains in static contact with the attachment while the denture cap, which is processed into the overdenture, has a full range of rotational movement over the male for a genuine resilient engagement of the prosthesis without any resulting loss of retention
Shop LOCATOR® Implant Abutments by Manufacturer
LOCATOR® Root & Bar Attachments
LOCATORs Root & Bar Attachments are made of high quality carbide something or another and work with all major dental implant manufacturers.
LOCATOR® Standard Range Male Retention Inserts
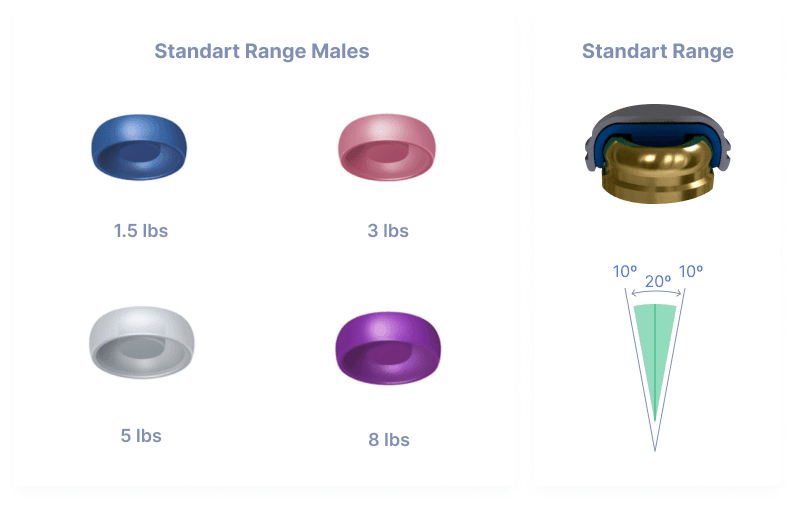
- Allows for insertion of the overdenture onto the dental implant abutment with up to 20° of divergence between both dental implants
- Available in 1.5, 3.0, 5.0 or 8.0 lbs retention force
- Retention force can be evaluated chairside depending on patient preference for level of ease-of-insertion and removal
LOCATOR® Processing Packages, Inserts & Housings
LOCATOR® Processing packages come in a variety of options. Replacement components can be purchased individually or in larger quantity insert packs.
LOCATOR® Impression Copings, Analogs & Tools
LOCATORs Impression Copings, Analogs & Tools are made of high quality carbide something or another and work with all major dental implant manufacturers.
LOCATOR® Dimensional Specifications
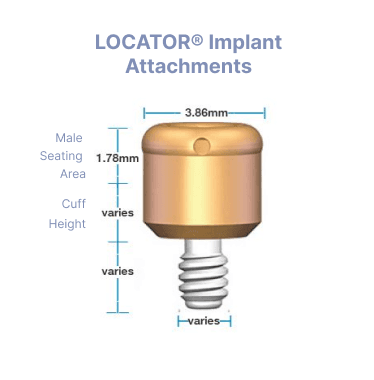
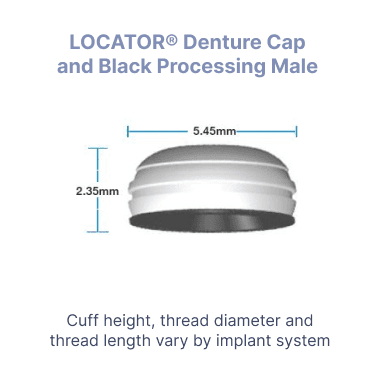
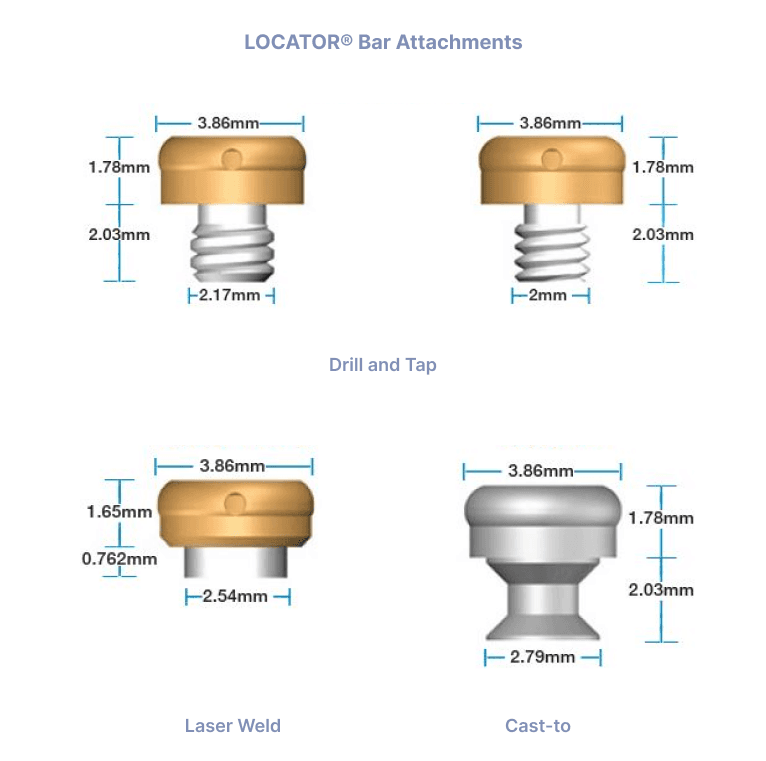
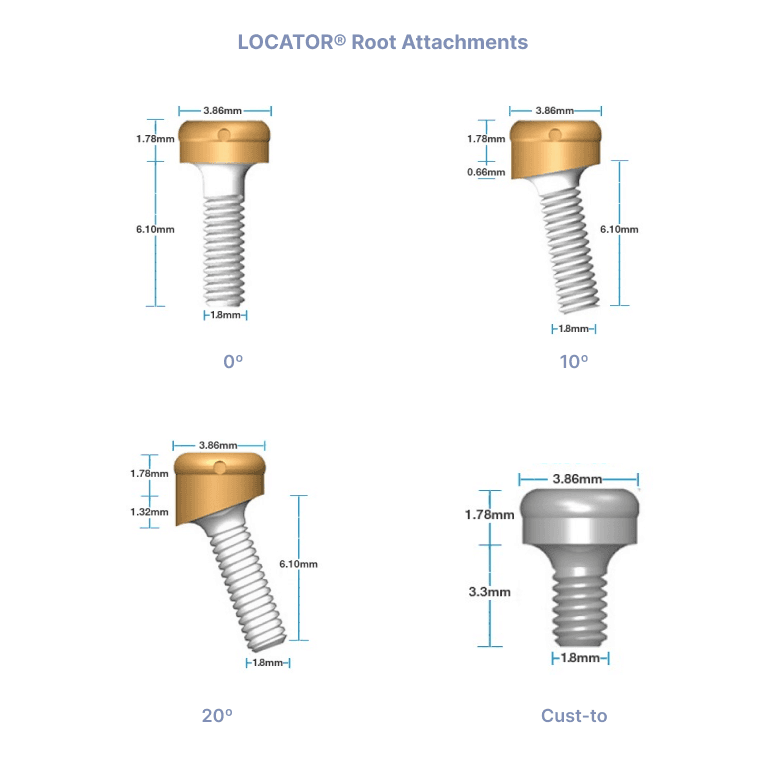
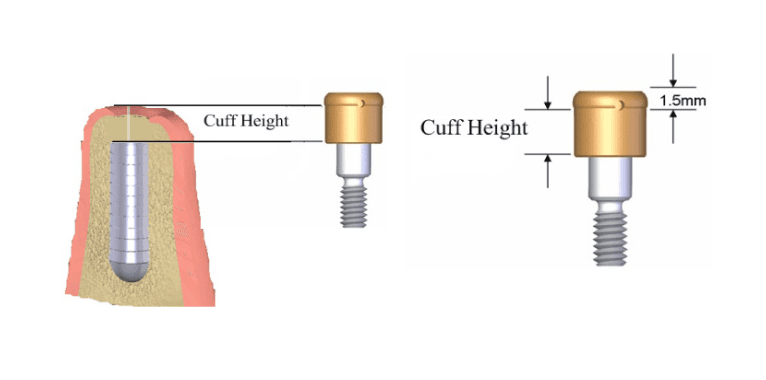
CUFF/TISSUE HEIGHT
LOCATOR® implant abutments should be ordered to the exact height of the gingival measurement.
The LOCATOR® Implant abutment has a built in additional 1.5mm of height. This 1.5mm allows the male attachment to fully seat on to the the abutment.
Please do not add 1.5mm to your measurements.
Troubleshooting LOCATOR® Attachments
Technical Resources
Documents
LOCATOR-Implant-Instructions.pdf
Custom-Single-Unit-Locator-Abutments.pdf
LOCATOR®-Multi-Unit-Abutment-Instructions.pdf
LOCATOR® Root Direct Placement Instructions (PDF)
LOCATOR-Component-Listing.pdf
LOCATOR® Retrofit for Worn ERA Attachments (PDF)
LOCATOR® versus Stern ERA Attachments (PDF)
Locator-Core-Tool-Instructions.pdf
LOCATOR-Implant-Bar-Instructions.pdf
Custom-Abutments-Using-Locator-Attachments-to-Correct-Extreme-Implant-Angulation.pdf


